Friday, April 17, 2020

APRIL 17 ... Indoor Scavenger Hunt

A SCAVENGER HUNT

Scavenger Hunts can be done anywhere! It's especially fun to collect things on a beach. Here's a sample of my scavenger hunt on the beach in Majahual, Mexico.
Find. Collect. Arrange. đŸ“·!


              STUDENT
INDOOR ^ SCAVENGER HUNT
* Find a baby spoon
* Find something green in the kitchen
* Find a partially used roll of toilet paper
* Find 2 things that have wheels
* Find 3 crayons, pencil crayons or markers
* Find something that has a scratchy surface
* Find a used tube of toothpaste
* Find a cool, old key
* Find a pair of brightly coloured socks
* Find a rubber band, paperclip and a penny
* Find a pair of sunglasses
* Find a favourite mug
* Find a snack
* Find a box of Kleenex
* Find a colourful tea towel 

How many things did you find??

Now, ARRANGE in an interesting composition  and take a PHOTO. 

Can you rearrange and make a LANDSCAPE  with a background, a mid-ground and a foreground? Take a second photo. 

In your sketchbook, draw and colour/shade your landscape!!

If you have any questions, or photos to share, please contact me at:


Tuesday, April 14, 2020

April 14 ... Outdoor Scavenger Hunt


OUTDOOR SCAVENGER HUNT

Being out in nature and creating beautiful things makes a heart happy. When you can combine nature, beauty, sketching and learning, it is a gift. This activity is designed to help you engage with nature, use your creativity and get you drawing.


In your sketchbook, or on a piece of paper, create a 3x4 grid. Make sure it is a FULL page. In each square you will need to sketch a found outdoor item. The sketch can be a full or a partial sketch with details, value/shade and, if you wish, colour. The example below illustrates a partial sketch of a pinecone. Doing a partial sketch allows for the artist to zoom in on a particular area of the item. Make sure that when doing a partial you fill the entire square.


Possible Outdoor items:
1 Textured bark                                                     
2 Multi-coloured rock
3 A bud starting to open
4 Seedpod
5 Old dried up berries
6 Animal scat (yuk, Mrs B!)
7 Pinecone
8 Dead or Alive insects (take photo for reference)
9 An antler
10 Tree branch
11 Lichen
12 Crocus
13 Needle patterns
14 Assorted leaves
15 Leaf skeleton
16 Trash  : (
17 New growth coming out of the soil
18 Bird (take photo)
19 Animal tracks in mud
20 Student choice!


When you are finished sketching your 12 items, label the drawings, take a photo of your page and send it to: 

It would be great to add your work to our ART at HOME Student Gallery slideshow!


Thursday, April 9, 2020

Apr 9 ... Easter Weekend Art Ideas


April 9 ... Origami, Easter Eggs and more

Here's a variety of seasonal activities that you may want to try. Even if you don't have origami paper, you could use gift wrap, magazine, scrap paper, etc. Use anything that has a different colour or pattern on each side. What else can you find at home to use?


Happy Easter Origami!


Have a wonderful Easter Weekend!

If you have any questions, or photos to share, please contact me at:


Monday, April 6, 2020

Apr 6 ... Art Project PART 2: Decorating your Tessellation


Hello, again!

So our Part 1 How to Build a Tessellation should be easy to do, as I'm sure YOU will have those basic materials in the house.

For PART 2, we have explored a variety of DECORATING ideas. Depending what you HAVE at home, you might find new materials to decorate your tessellation. Be creative with what you have!


Hope you enjoy designing, building and decorating your tessellations.
I look forward to seeing your photos!

If you have any questions, or photos to share, please contact me at:
mspsartroomatsms@gmail.com


NEXT UP:  A few activities for Easter Weekend! 

Apr 6 ... Art Project PART 1: How To Build a Tessellation


Hola!
Finally, here it is, our 1st Art Project from Home!

In the following photos, we have shown you what materials you'll need, how to build a simple tessellation,  how to trace your design and for a challenge, how to build a rotational tessellation. In Part 2, we'll show you samples of our tessellations that we've done using a variety of materials. Use what you can find at home. BE CREATIVE!

We look forward to seeing your designs and finished projects. Don't forget to take photos and mail them to:   mspsartroomatsms@gmail.com

Again, these projects are for all SMS students, past, present and future, and you might even decide to try a family tessellation project.

Have fun!
Ms P


Click on photo to enlarge (I hope)


ROTATIONAL TESSELLATION


How many tessellation designs did YOU create??

See Part 2 for ways to decorate your tessellations.

If you have any questions, or photos to share, please contact me at:
mspsartroomatsms@gmail.com


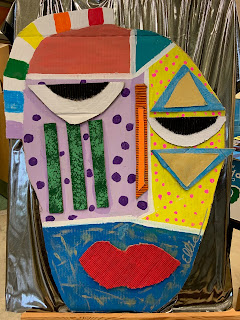
ART 8 MASKS inspired by Picasso & Kimmey Cantrell & Eric Straw

  UNDER CONSTRUCTION inspired by Kimmey Cantrell Kimmey Cantrell characteristics Pablo Picasso characteristics Eric Straw characteristics Ho...